[COMPANION POST FOR APPLE DEVICES]
One of the initial challenges of performing an Android mobile application penetration test is getting a suitable test environment setup. One of the easiest ways to do that is to obtain an Android device with a stock operating system, such as a Pixel 3a. These devices are relatively inexpensive for the amount of functionality and power they provide, unlocked for any carrier use, and their ability to be rooted and updated to the latest operating systems means they can be supported for years to come.
However, even with these benefits, there are several challenges and security mechanisms within Android that prevent a pentester from quickly building an environment. There is a lack of widespread Android 10 information available, Android versions 7+ make it difficult to install interception proxy certificates without root, and information for various components of the rooting process are spread across multiple resources.
This guide is meant to be comprehensive and provide the easiest walk-through on how to setup an Android 10 device for a pentester or a pentesting team to easily test Android applications in the future. This will cover the following steps:
- Preparing the Android device and local computer
- Unlocking the bootloader
- Rooting the Android device using the Magisk Manager
- Installing modules to easily install man-in-the-middle certificates for interception proxies, like Burp Suite Professional
Note: These steps will erase the phone! Save any required data before proceeding. If setting up an already rooted device for a new user’s burp certificate, skip to the ‘Interception Proxy Certificate Install’ section. In addition, it is recommended to not to use your everyday phone as a penetration testing device. Several of these steps outlined below will purposefully lower the security posture of the device.
All steps below were performed on a Pixel 3A running on Android 10 updated to the January 2020 version, with the computer running MacOS 10.15 Catalina. These steps can be somewhat modified to similar devices running Android 7 and above. Additional information has been included in the post below to where add possible.
Install Software on Computer
Download adb and fastboot to the computer from https://developer.android.com/studio/releases/platform-tools.html. Save and extract the ‘platform-tools’ folder to a location you can easily access via command line, such as your Documents or Desktop.
On Mac, download and install the Android File Transfer application from https://www.android.com/filetransfer. For other OS platforms, check out https://support.google.com/android/answer/9064445?hl=en for more information on how to transfer files via USB to the Android device.
Install openssl on the computer if it is not already installed.
Enable USB Transfer
Plug the USB cable into the computer and the Android device. The Android device may pop up with a trust warning at this or any of the following steps. Click yes to accept when it appears.
Bring down the notification menu and tap the USB settings.
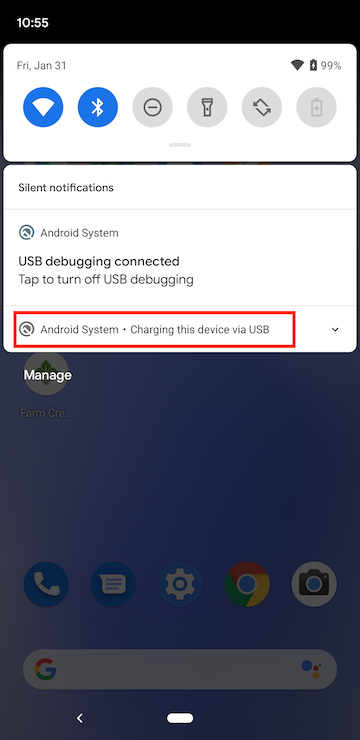
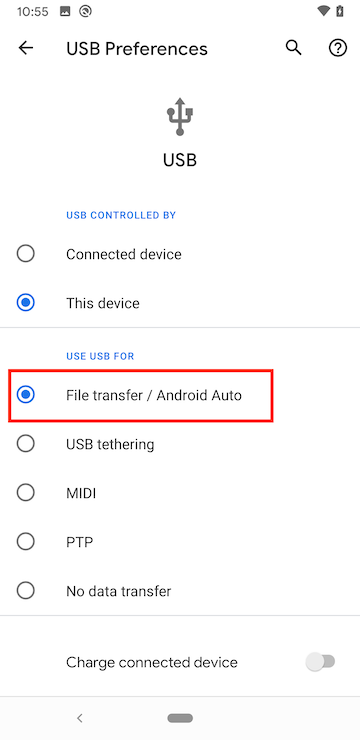
Tap the ‘Use USB for File Transfer’ button.
After the USB settings are turned on, the Android File Transfer app should start automatically on Mac. The USB Cable will be connected through the rest of the rooting process.
As a note, this process will need to be completed again after the bootloader has been unlocked the phone is rooted.
Android Phone Setup
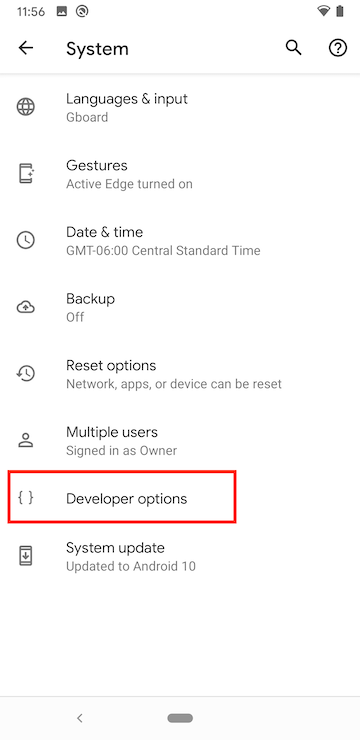
On the Android phone, open Settings.
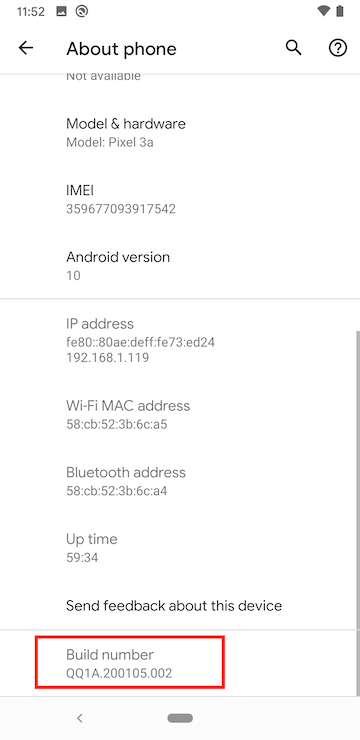
Open About Phone.
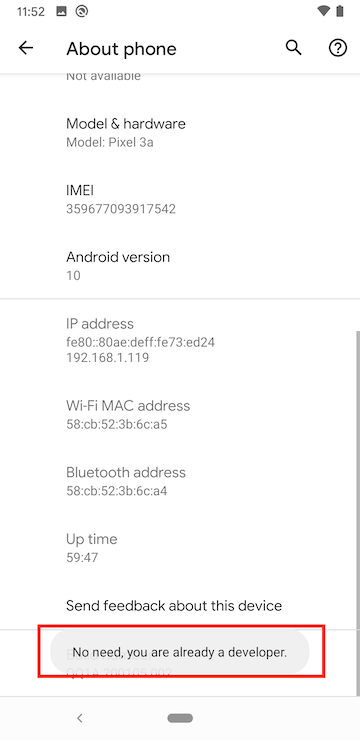
Scroll to the bottom and tap ‘Build Number’ seven times.
A message will show that Developer mode has been unlocked. (Screenshot shows developer mode already enabled in this case)
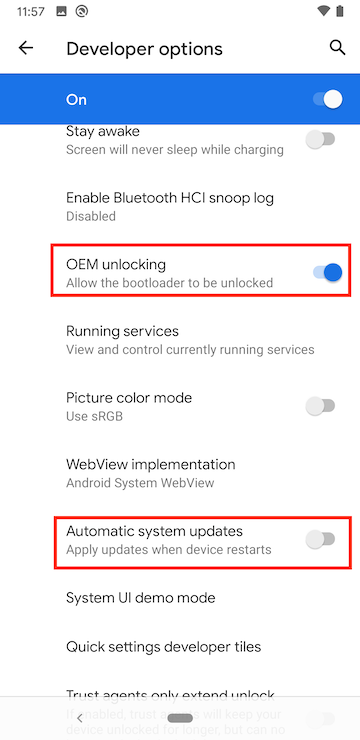
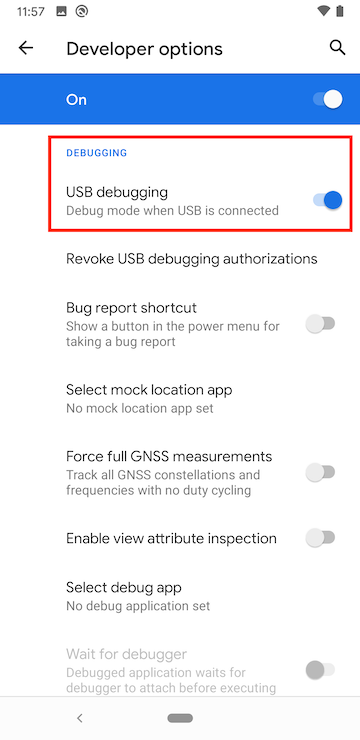
Go to System > Developer Options and tap to enable ‘OEM unlocking’, disable ‘Automatic system updates’, and enable USB Debugging.
Unlocking Bootloader
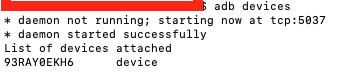
On the computer, navigate within a terminal window to the downloaded ‘platform-tools’ folder. Type:
adb devices If a device is not showing up in the list, try resetting the USB cord and verifying that USB debugging is enabled on the Android device.
The following commands will unlock the bootloader and restart the phone into the bootloader:
fastboot flashing unlock adb reboot bootloader The Android device will start in a bootloader screen. Use the buttons on the phone (volume buttons to scroll and power button to select) to follow the on-screen prompts and unlock the bootloader. The phone will erase and unlock the bootloader.
Post Bootloader Phone Setup
Go through the initial wizard setup. Skip steps wherever possible with the exception of connecting to a WiFi network. Turn off any analytics or automatic download processes to reduce as much network traffic as possible from the phone.
Reperform all of the steps in the ‘Enable USB Access’ and ‘Android Phone Setup’ sections to enable developer options and USB access.
Magisk Install and Patch
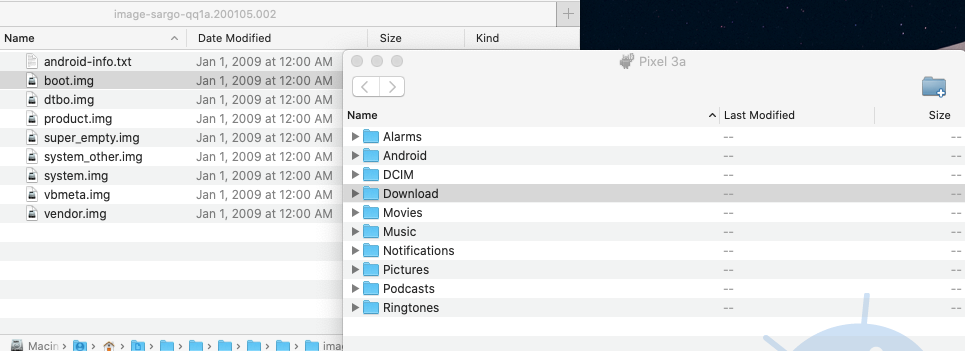
Download the stock factory image from Google at https://developers.google.com/android/images. For the Pixel 3a, it can be found underneath the ‘sargo’ section. Match the date of the OS to the correct version to download. This file will be rather large, but only a few files will be needed from it.
Extract the downloaded factory image zip, find the boot.img file, and transfer it to the Android device’s Download folder via USB.
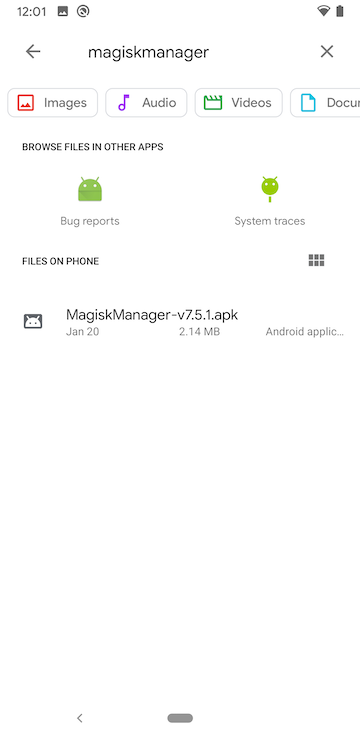
Download the latest Magisk Manager APK from https://magiskmanager.com and transfer it to the Android device’s Download folder via USB.
Open the Files application and tap the Magisk Manager APK to start the install. Follow the prompts of the Android device to complete the installation. Check https://magiskmanager.com for any updated version specific instructions on how to install.
Open the Magisk application on the Android device.
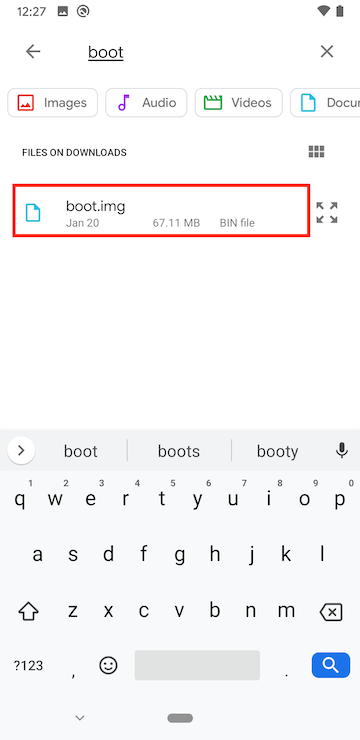
Tap Install next to the Magisk listed at the top and tap ‘Select and Patch a File’.

Find the boot.img file in the Downloads and select it. Magisk will patch the file and drop it in a file named ‘magisk_patched.img’.
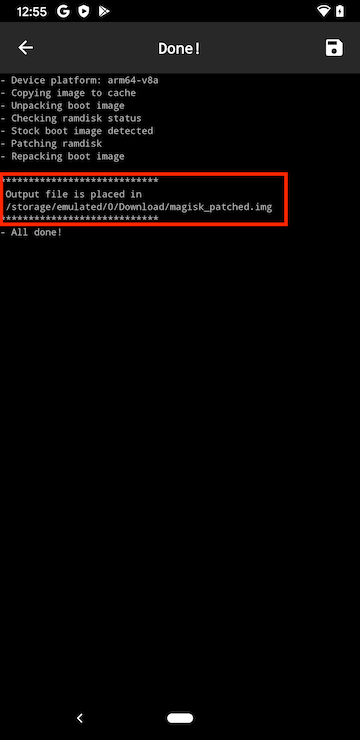
Transfer the magisk_patched.img file from the Android device back to the computer into the platform-tools folder used for adb and fastboot.
Flash Boot Image
While the computer is connected via USB, type:
adb devices to see if the device is active. If a device is not showing up in the list, try resetting the USB cord and verifying that USB debugging is enabled on the Android device.
On the computer, navigate within a terminal window to the ‘platform-tools’ folder. Type the following commands to flash the boot image with the Magisk image and reboot the device:
fastboot flash boot magisk_patched.img
fastboot reboot
Magisk Verification and Certificate Plugin Install
When the device reboots, open the Magisk app to verify the flashed boot image was successfully installed and root status is active. There should be two checkmarks next to the Magisk characters and more options appear underneath the Menu (such as Superuser).
Magisk has the ability to install modules to aid with common operations. For pentesting, a common task is to get installed certificates into the System certificate store, as versions after Android 7.0 no longer accept user installed certificates for mobile applications. One module called ‘Move Certificates’ will copy all certificates from the User store to the System store upon reboot.
To install this module, open Magisk, tap the Menu, and tap Downloads.
Search for the ‘Move Certificates’ module click the download icon. The phone will need to be rebooted for the module to install.

Interception Proxy Certificate Install
These steps will follow using Burp Suite for the interception proxy, but the same steps can be applied to any other similar tool.
Download the certificate from Burp from going to Proxy > Proxy Options and download the .DER file. Use a name like ‘cacert’ or ‘burpandroid’.

On the computer with openssl installed, navigate to the downloaded certificate directory and convert the .der format to a .pem format with the following command:
openssl x509 -inform DER -in cacert.der -out cacert.pem
Copy the .cer certificate to the Downloads folder on the Android device via USB.
On the Android device, open Settings and search for certificates. Tap the first option to go into the Wi-Fi preferences, and tap Install Certificates.

Locate and tap the .pem certificate from the Downloads folder.

Install the certificate using the ‘Credential use’ option set to ‘VPN and apps’. Use a friendly name in case multiple people are required to use the Android device for testing.

Restart the phone. The Magisk extension will copy the certificate from the User certificate store into the System certificate store.
Conclusion
At this point, only the ‘Interception Proxy Certificate Install’ section is required for future certificate installation. No other unlocking or rooting steps need to be completed on the Android device. The phone can now be setup to proxy through the intercepting proxy or can run multiple tools that all require root access, such as adb, apktool, drozer, etc. For a sample of where to start, begin with the OWASP Mobile Security Testing Guide.